Sunday, August 18, 2019

Cardboard Luigi Mario Cart Costume
I loved how this turned out. Mostly, because my 8 year old thought it was sooooo cool:)lol 
Supplies/Tools: Kirkland Size 3 Diaper box, 1 Home Depot medium boxes, 2 paper plates, 2 paper bowls, 1 white poster board, 2 styrofoam cones (walmart craft section), rotary board, utility knife, hot glue gun and MANY glue sticks, polyester foam filling, yellow felt, White Primer spray paint, acrylic paint, straps from an old carseat (you can buy straps at Joann's Fabric, usually in the ribbon isle)
I wrapped styrofoam cones with postboard to make the "Mufflers", then stuffed them with polyester filling and covered with yellow felt to give it a domed look.
The wheels were a trial and error process. In the end I used a dinner plate and a kids plate as stencils for the size. The wheels were attached by stacking and gluing squares to the frame and then gluing the wheel to the squares, so the wheels aren't hollow. 
The tread on the wheels is cereal boxes, but I could have used the poster board for that. Later, I used a hot glue gun and covered them with black fleece, which gave them texture and was easier than painting several coats.
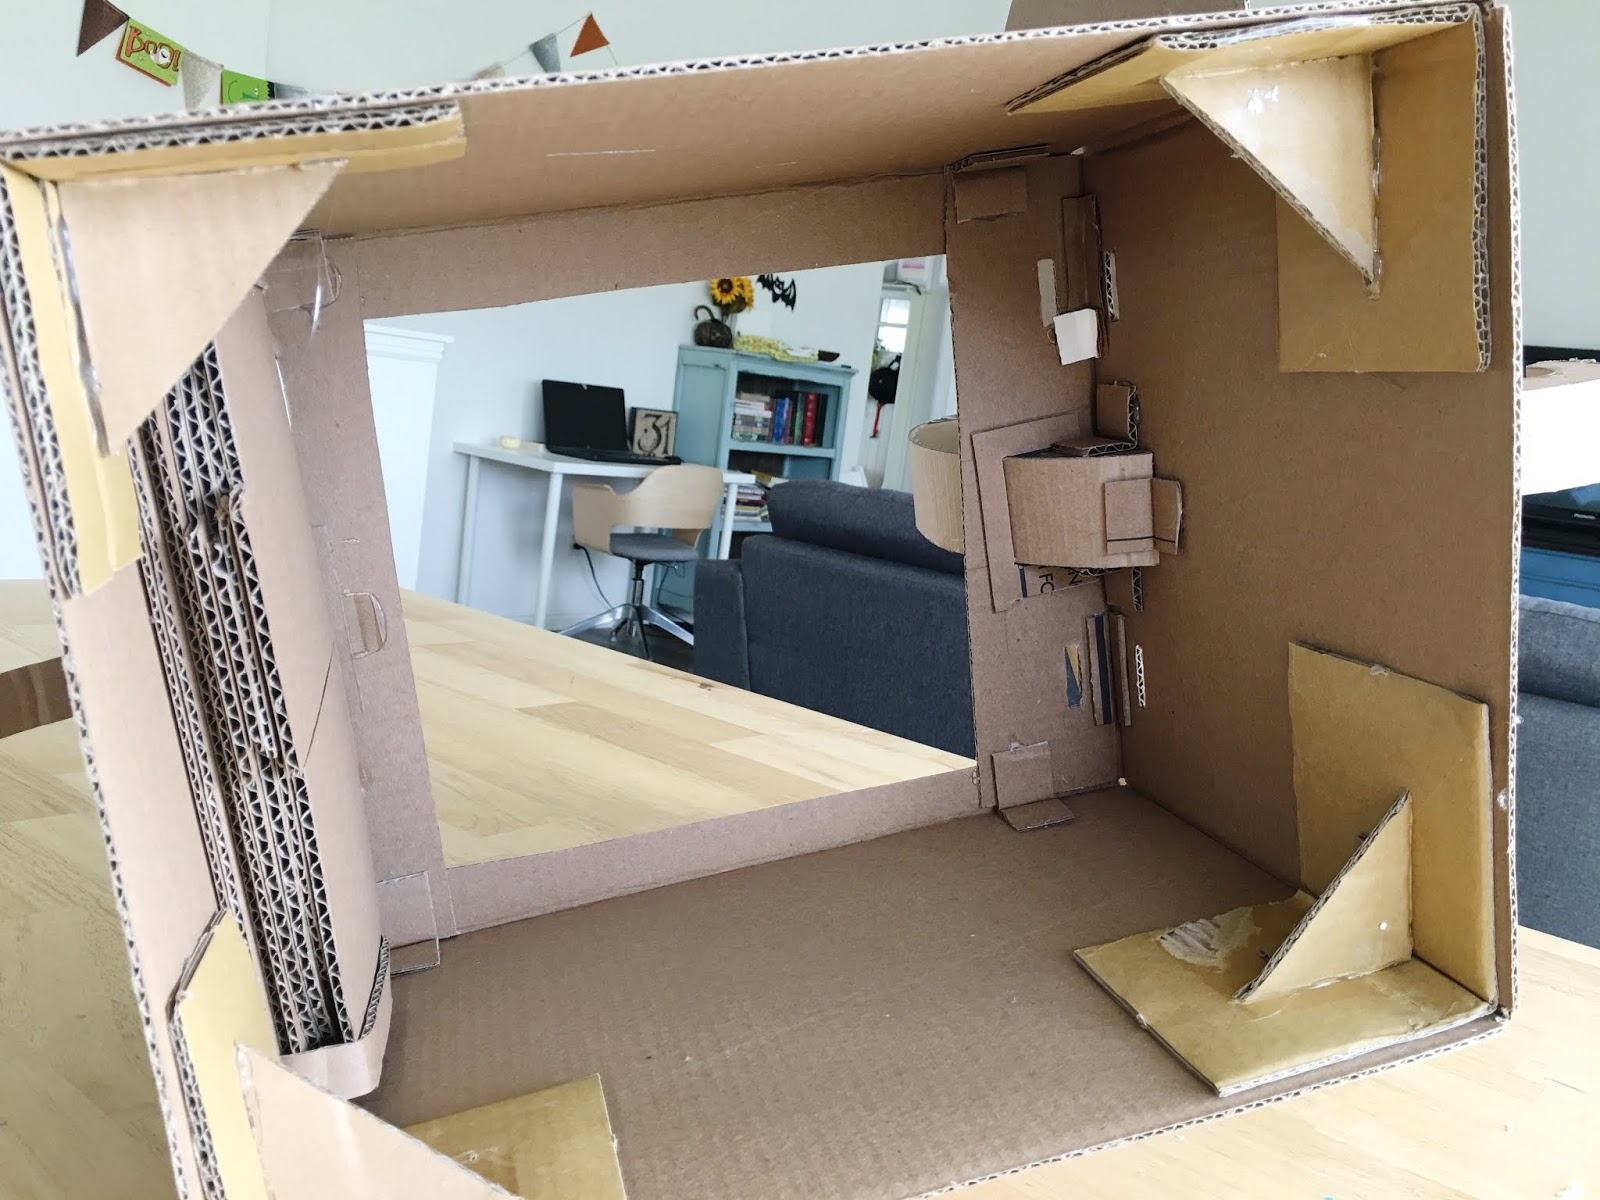
In this pic you can see how I reinforced the seams with small 1x2 inch pieces of cardboard. Make a crease in the middle and then glue both sides to the seam for strength.

This was the Priming stage. I used a spray paint primer for speed.
I also used spray paint for the green and blue, but if I did it again I would use acrylic paint and a sponge brush. Taping everything was a nightmare.

The outfit was purchased from Walmart. Honestly, her excitement made all the work so worth it.


The Crew ready to go Trick or Treating! We also  did Pegasus Unicorn, Monster Truck and Baby Elephant.


Cardboard Unicorn Costume
For this one I bought a pdf pattern, which I couldn't download, so I had to eyeball it. Painting was by far the most challenging part. Supplies/Tools: Home Depot XS Moving Boxes, rotary board, utility knife, hot glue gun and sticks, white primer spray paint, acrylic paint, rhinestone stickers, elmers glue and glitter.

To attach the head and tail I cut slits in the box and the neck and slid them into each other. Then small 1x2 inch pieces of cardboard and glued them to the seams to reinforce them.
Spray primer stage.
I used gold glitter for the horn and pink Rhinestones for the cutie mark and to outline the mane and tail. I used opaque glitter on the wings. Really, you just can't use enough sparkles and bedazzlement on a unicorn:)
She was joined by Mario Cart Luigi, Monster Truck and Baby Elephant. Trick or Treating here we come!


Cardboard Monster Truck Costume
Oh, Man!! I loved this project!! I think my favorite part was the fuzzy eyebrows and roll bar. The wheels gave me some problems, but paper plates solved that. The inspiration for the shape came from here. The idea for the license plate and teeth grill came from here. Supplies/Tools: Rotary board, utility knife, hot glue gun and sticks, 4 paper plates, black fleece (felt would work), fuzzy fabric, straps (you can find these in the ribbon isle at Joann's) white spray primer, acrylic paint, lots and lots of Diet Coke.
It was really important to me that the wheels were firmly attached to the body. If anything was going to fall off I thought it would be them. I stacked and glued cardboard squares together and then glued them to the paper plates, then I attached the tread part of the tire. I did the same thing for the Head lights, but now that I think of it I could have cut the bottom off a plastic cup and glued it on.
I really wanted to put stuff in the bed of the truck and hold it down with a net, but I scratched that.
In this pic you can see how I used 1x2 inch cardboard pieces and glued them into the seams to reinforce them.


The spray primer phase.
I used spray paint for the blue, but DON'T DO THAT! Taping everything was a nightmare. Use acrylic paint and a sponge brush.


We also made Mario Cart Luigi, Pegasus Unicorn, and Baby Elephant. Trick or Treating here we come!!


Cardboard Elephant Costume
Last year I started a fun adventure into the world of cardboard costumes. I did a little research into cardboard sculpture/art and decided I would start with a simple box, and then manipulate that basic shape. My tools were simple: a rotary board, a box cutter/utility knife, a hot glue gun, MANY  hot glue sticks, pink felt, tulle fabric, straps, and a few cardboard boxes. I started with the simplest costume, an elephant:) I apologize that I didn't take step by step pictures, but I think these will suffice. 
 In these pics you can see all the seams where the cardboard was connected with hot glue.
 The ears are connected by cutting a slit in the hollow head, and the ear and then sliding them into eachother.

The most important thing I learned in the process what that I needed to strengthen everywhere I made a seam. Take a small 1x2 inch piece of cardboard, pinch it in half and then glue it into the seams.


 The next step was getting them ready to paint. I started with a spray paint primer, so none of the decals on the homedepot boxes would show through.
 Spray paint. I had to apply SO MANY COATS. Be careful, it can drip.
 The Pink on the noseand tail is felt I hot glued on. The bows are white tulle.

I had grand plans for a cute outfit she could wear with her Elephant, but that went out the window:) lol. She was joined by Mario Cart Luigi, Pegasus Unicorn, and Monster Truck. Trick or Treating here we go!